
Objective
This smart security system uses an ultrasonic sensor to detect objects within a specified range. When an object is detected, a red LED lights up, and a buzzer sounds to alert users.
Components (Things You will need)
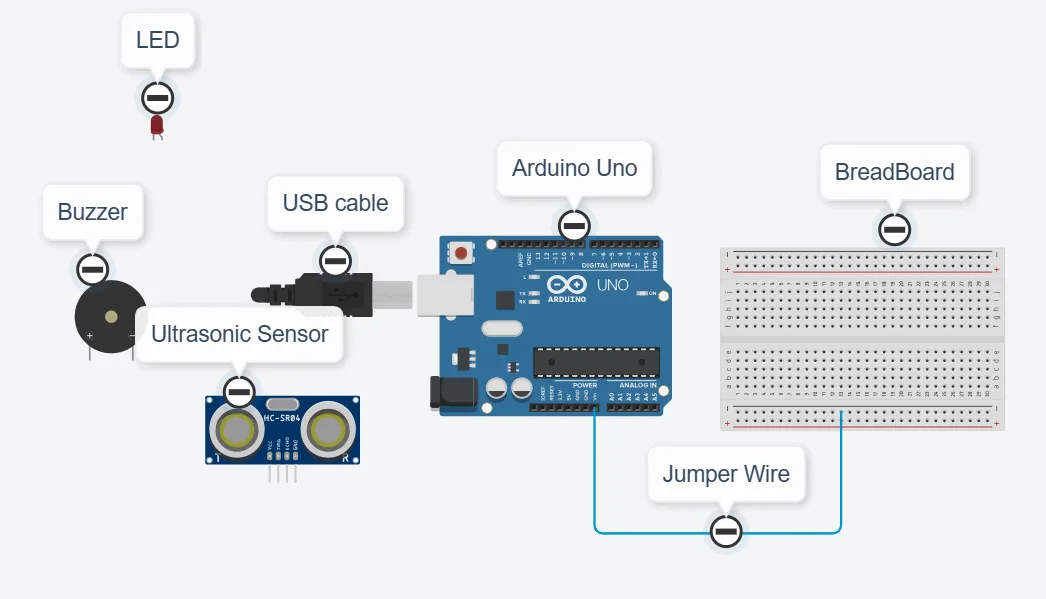
Building the circuit
Things Needed:
- Arduino Uno = 1
- Arduino USB cable = 1
- Red LED = 1
- Ultrasonic sensor = 1
- Buzzer = 1
- Red jumper wire = 1
- Blue jumper wire = 1
- Black jumper wires = 2
- White jumper wire = 1
- Orange jumper wire = 1
- Green jumper wire = 1
- Brown jumper wire = 1
Mounting the component on the breadboard
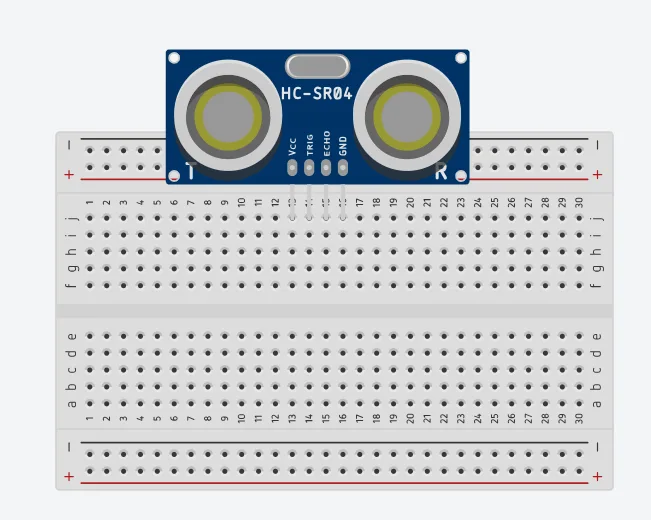
Step 1: Take the breadboard and the ultrasonic sensor and insert it into the vertical connectors on the breadboard as shown below.
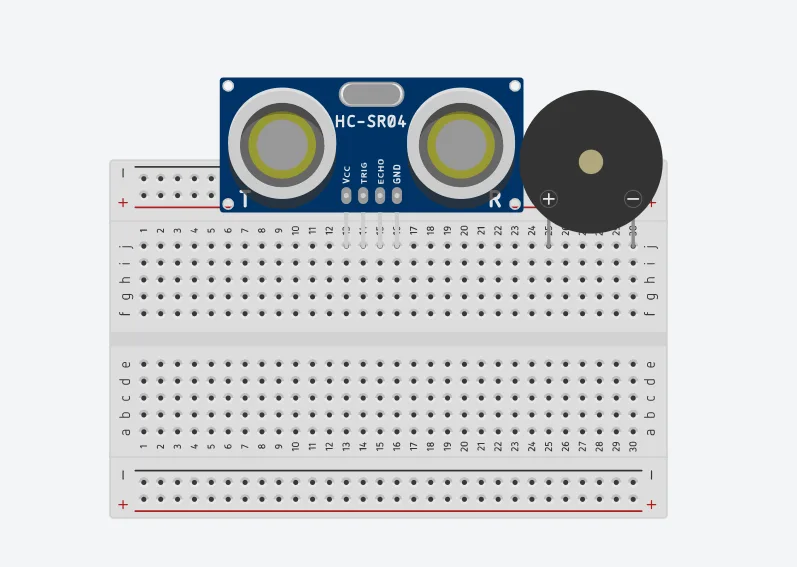
Step 2: Take the buzzer and insert it into the vertical connectors on the breadboard beside the ultrasonic sensor as shown below.
Step 3: Take the red LED and insert it into the vertical connectors on the breadboard beside the buzzer as shown below.
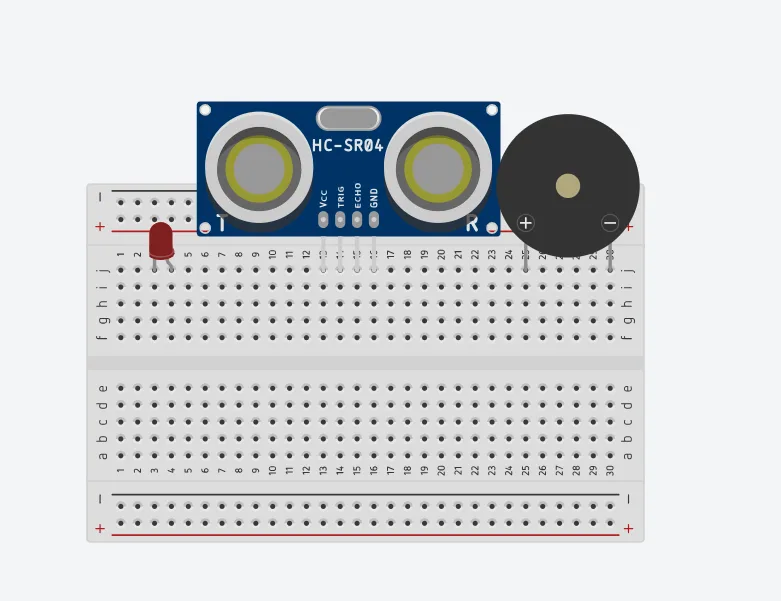
NB: Make sure you identify where the positive pin (+) and the negative pin (-) are connected to on the breadboard. The longer pin of the LED is the positive pin and the shorter one, the negative pin.
WIRING THE CIRCUIT
Things Needed:
- Red jumper wire = 1
- Blue jumper wire = 1
- Black jumper wires = 2
- White jumper wire = 1
- Orange jumper wire = 1
- Green jumper wire = 1
- Brown jumper wire = 1
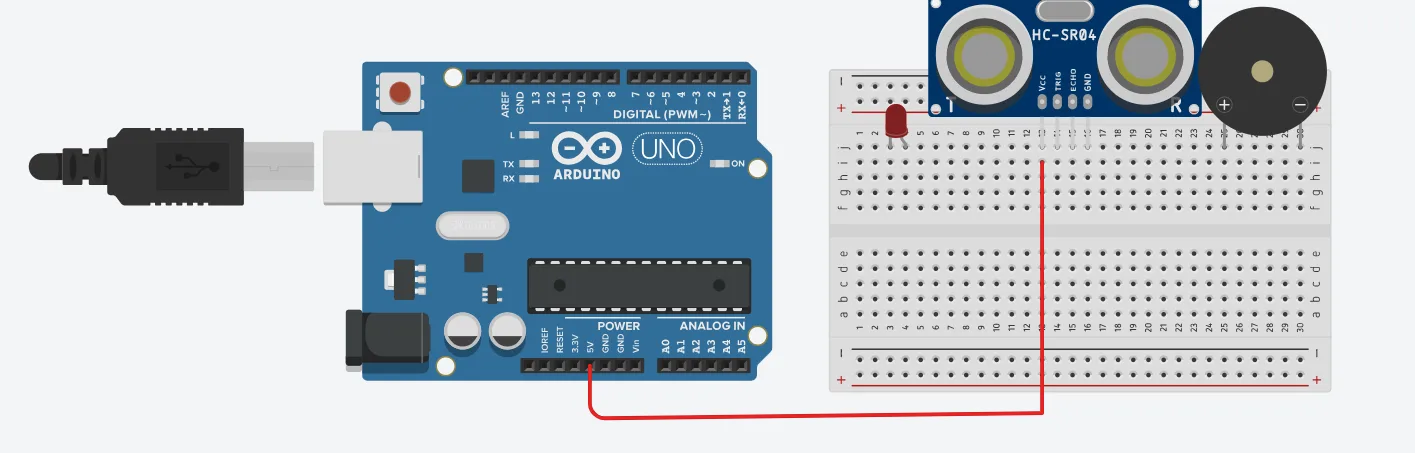
Step 1: Connect one end of the red male-to-male jumper wire to the VCC pin of the ultrasonic sensor on the breadboard and the other end to 5V on the Arduino UNO as shown below.
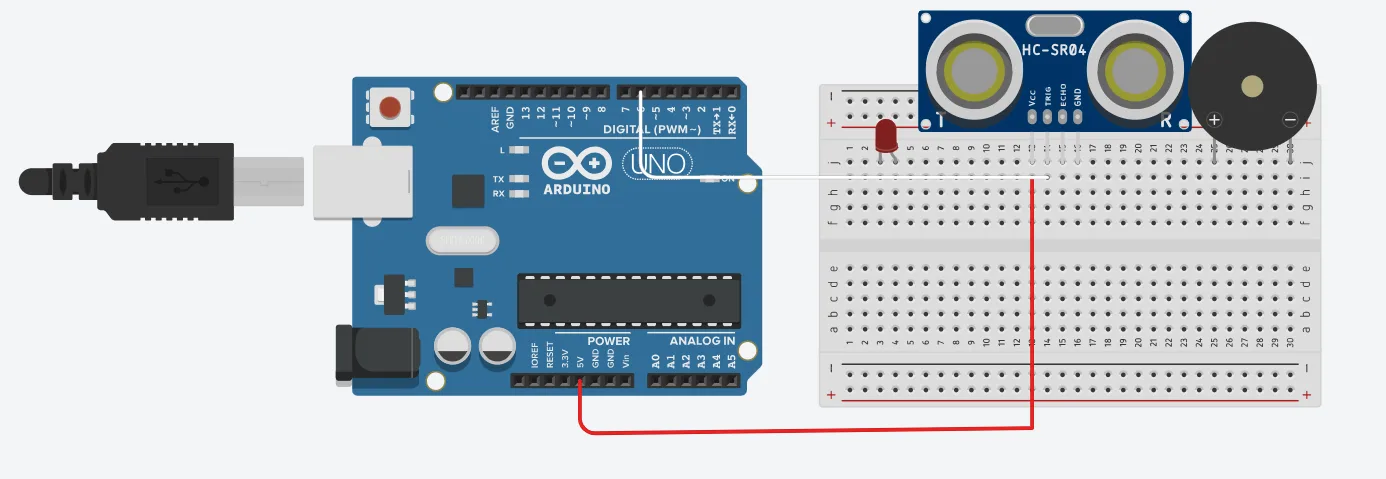
Step 2: Connect one end of the white male-to-male jumper wire to the TRIG pin of the ultrasonic sensor on the breadboard and the other end to digital pin number 6 on the Arduino UNO as shown below.
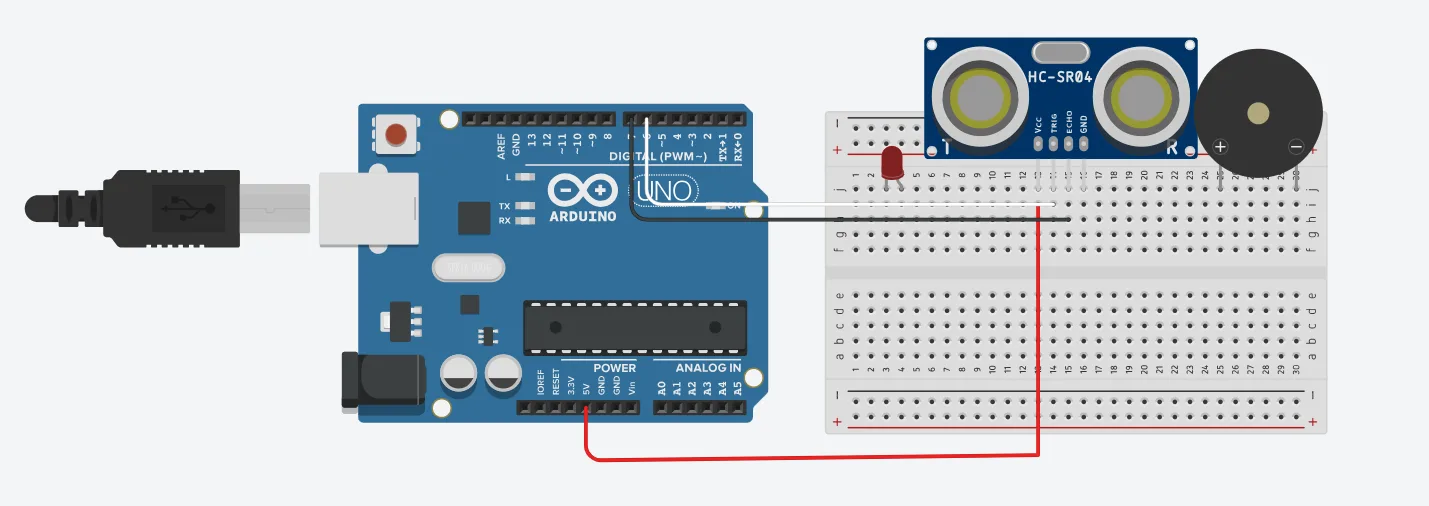
Step 3: Connect one end of the black male-to-male jumper wire to the ECHO pin of the ultrasonic sensor on the breadboard and the other end to digital pin number 7 on the Arduino UNO as shown below.
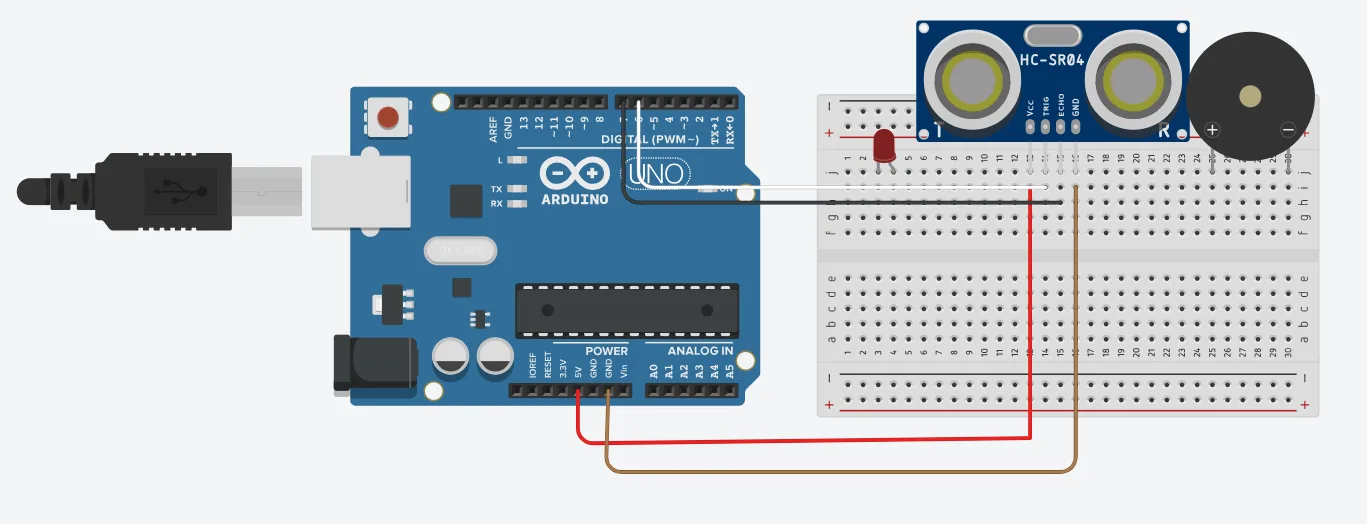
Step 4: Connect one end of the brown male-to-male jumper wire to the GND pin of the ultrasonic sensor on the breadboard and the other end to GND on the Arduino UNO as shown below.
Step 5: Connect one end of the black male-to-male jumper wire to the positive pin of the buzzer on the breadboard to digital pin number 8 on the Arduino UNO as shown below
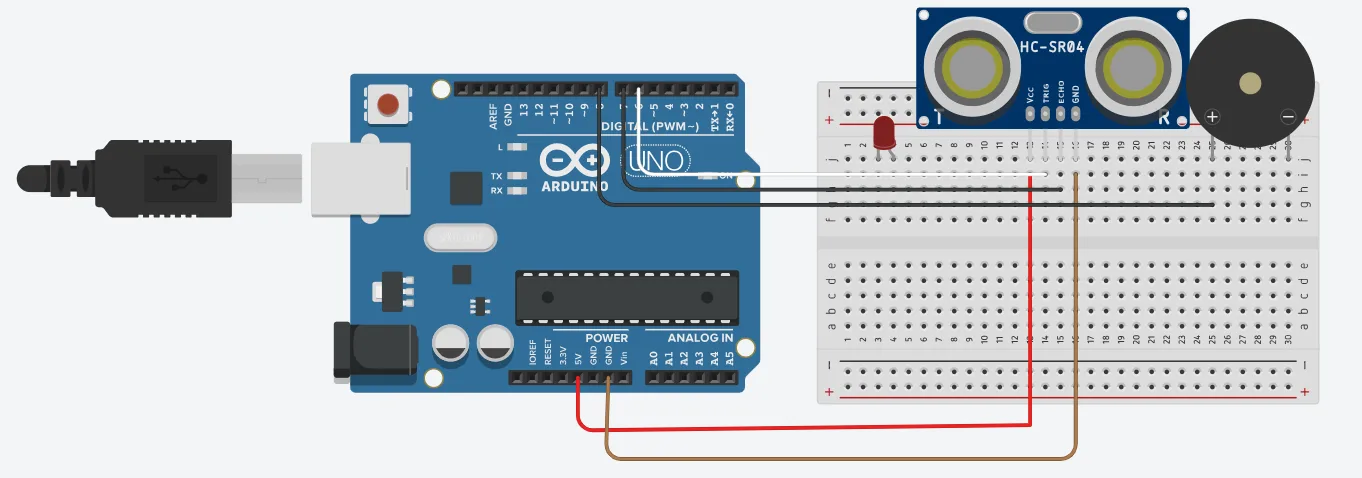
Step 6: Connect one end of the orange male-to-male jumper wire to the negative pin of the buzzer on the breadboard to GND on the Arduino UNO.
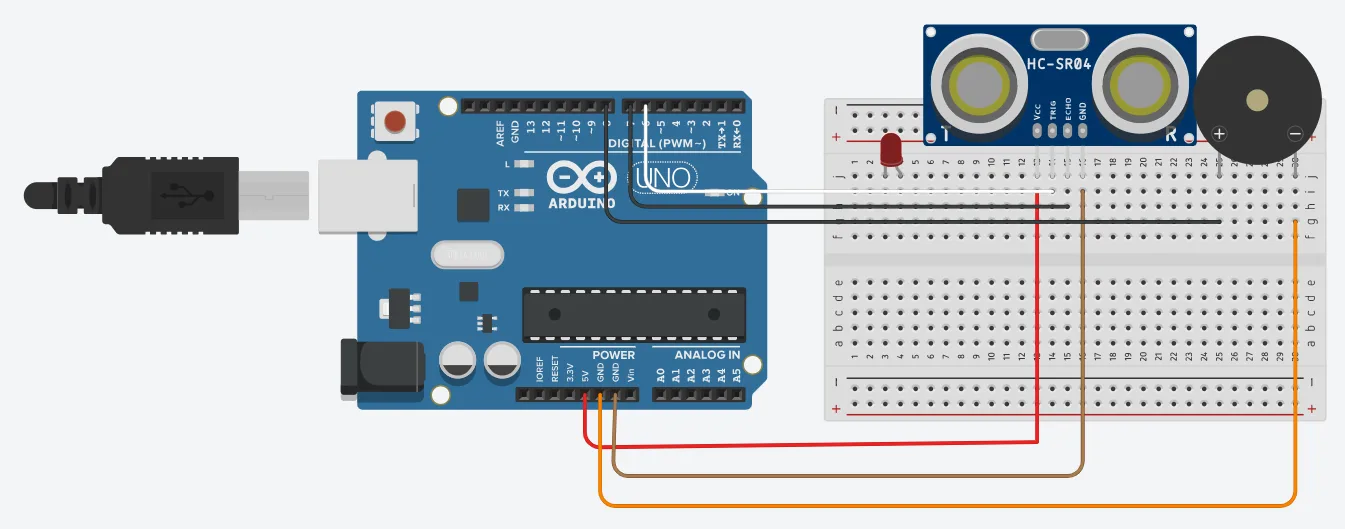
Step 7: Connect one end of the green male-to-male jumper wire to the positive pin of the red LED on the breadboard to digital pin number 9 on the Arduino UNO as shown below.
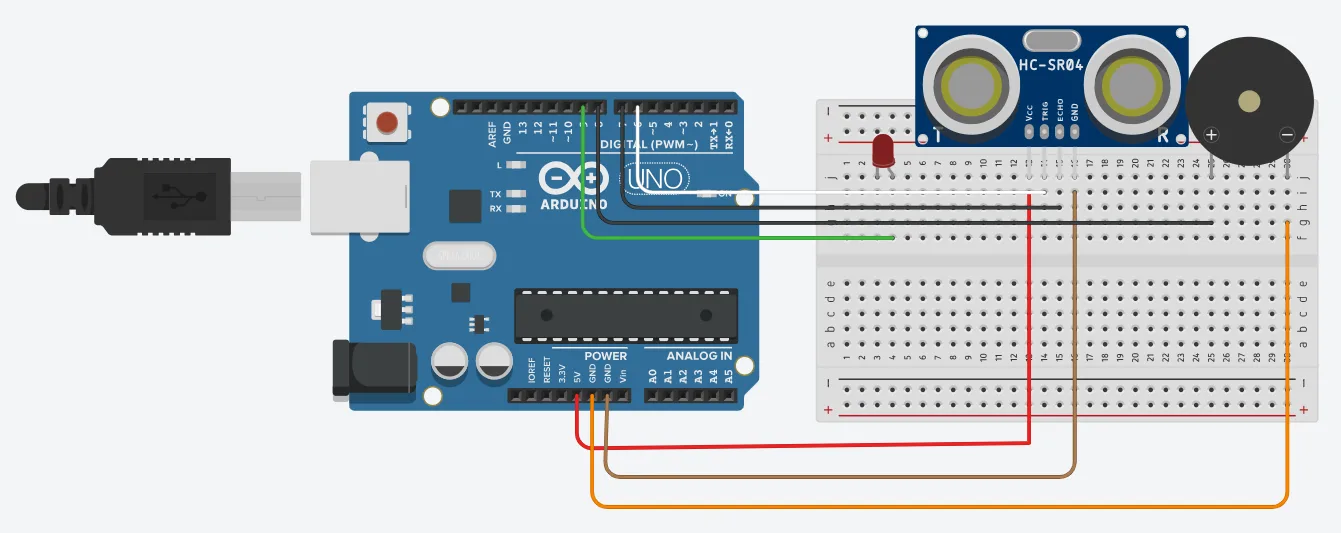
Step 8: Connect one end of the blue male-to-male jumper wire to the negative pin of the red LED on the breadboard to GND on the Arduino UNO.
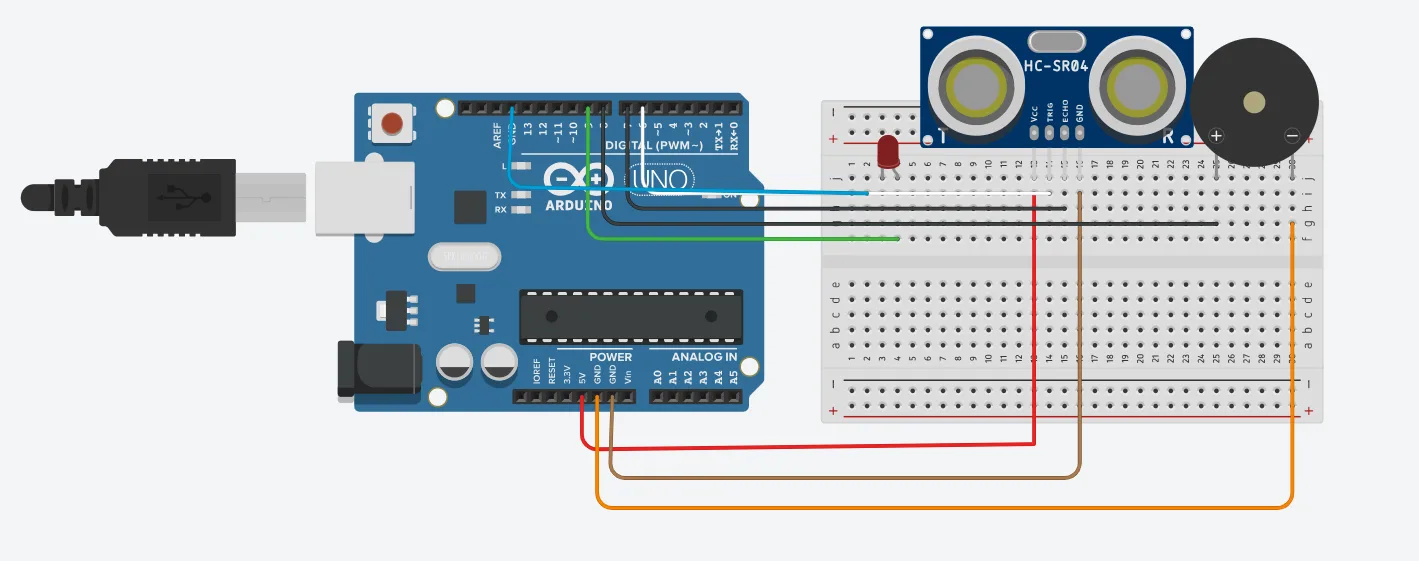
Make sure you connect the Arduino USB using the blue cable to the Arduino board.
PROGRAMMING
Step 1: Open your Arduino IDE.
``` cpp // Pin definitions const int trigPin = 6; const int echoPin = 7; const int redLEDPin = 9; const int buzzerPin = 8; const int distanceThreshold = 20; // Threshold in cm
void setup() { // put your setup code here, to run once: pinMode(trigPin, OUTPUT); pinMode(echoPin, INPUT); pinMode(redLEDPin, OUTPUT); pinMode(buzzerPin, OUTPUT); Serial.begin(9600); }
void loop() { // put your main code here, to run repeatedly: long duration; int distance;
// Trigger ultrasonic sensor digitalWrite(trigPin, LOW); delayMicroseconds(2); digitalWrite(trigPin, HIGH); delayMicroseconds(10); digitalWrite(trigPin, LOW);
// Read echo pin duration = pulseIn(echoPin, HIGH); distance = duration * 0.034 / 2;
// Check distance and activate alarm if (distance < distanceThreshold) { digitalWrite(redLEDPin, HIGH); tone(buzzerPin, 1000); } else { digitalWrite(redLEDPin, LOW); noTone(buzzerPin); }
delay(100); //Read the Serial monitor Serial.print(distance); Serial.println("cm"); delay(500); } ```
Step 4: Save your code.
Step 5: Select the arduino board and port.
Step 6: Upload your code.
CONCLUSION
This project provides a simple and effective way to enhance security using readily available components. It’s easy to set up and suitable for beginners.