
Objective
This project introduces a simple circuit using a push button and a buzzer. The push button acts as a trigger to activate the buzzer, which can be used for applications like a quiz contest bell or notification systems.
Components (Things You will need)
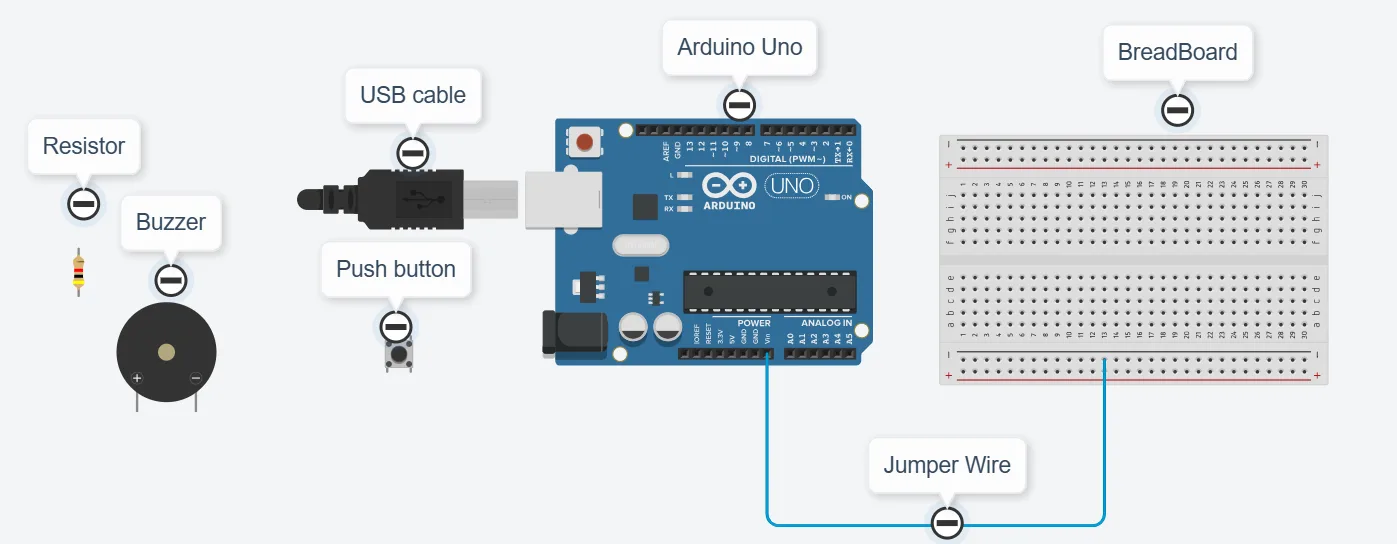
Building the circuit
Things Needed:
- Arduino Uno = 1
- Arduino USB cable = 1
- Buzzer = 1
- Red jumper wires = 2
- White jumper wire= 1
- Green jumper wire= 1
Mounting the component on the breadboard
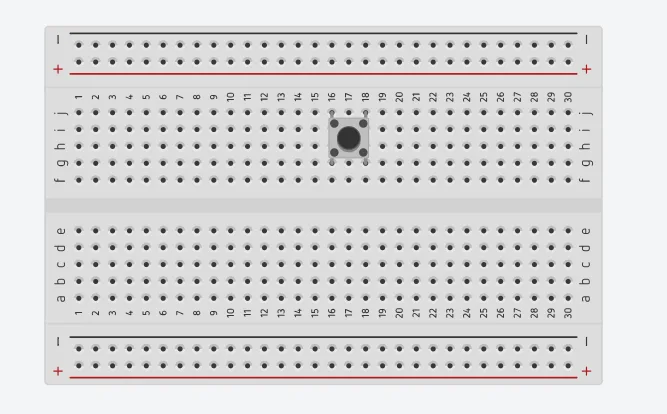
Step 1: Push Button:Insert two pins into row g and two pins into row d on the breadboard
step 2: Buzzer: Insert the buzzer into row J on the breadboard. Ensure the longer pin (positive) is correctly aligned.
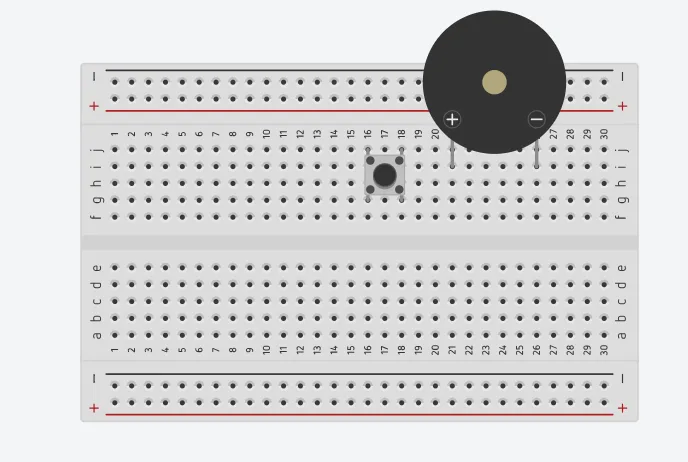
Note:Take note of where each of the pins are placed on the bread board
WIRING THE CIRCUIT
Things Needed:
- Red jumper wires = 2
- White jumper wire= 1
- Green jumper wire= 1
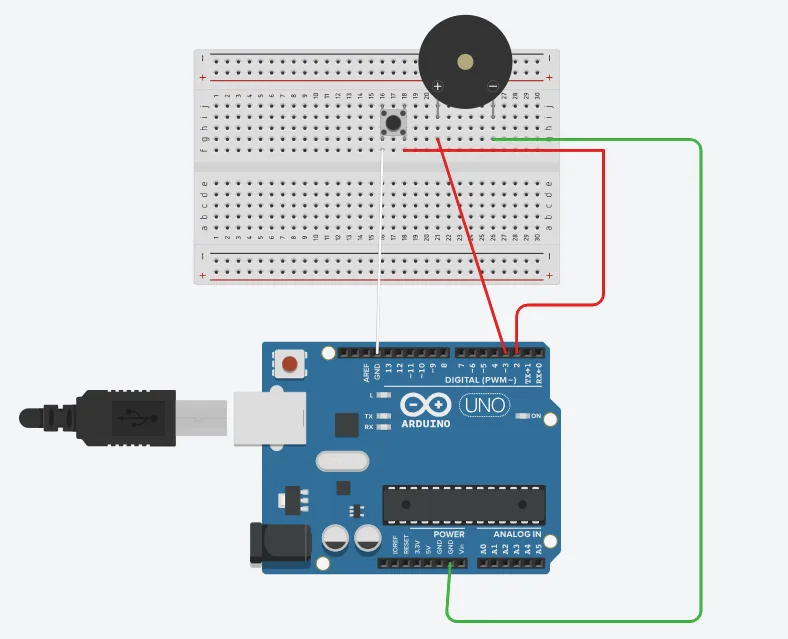
step 1: Red Wire: Connect one end to the pin on the breadboard and the other end to Digital Pin 2 on the Arduino Uno.
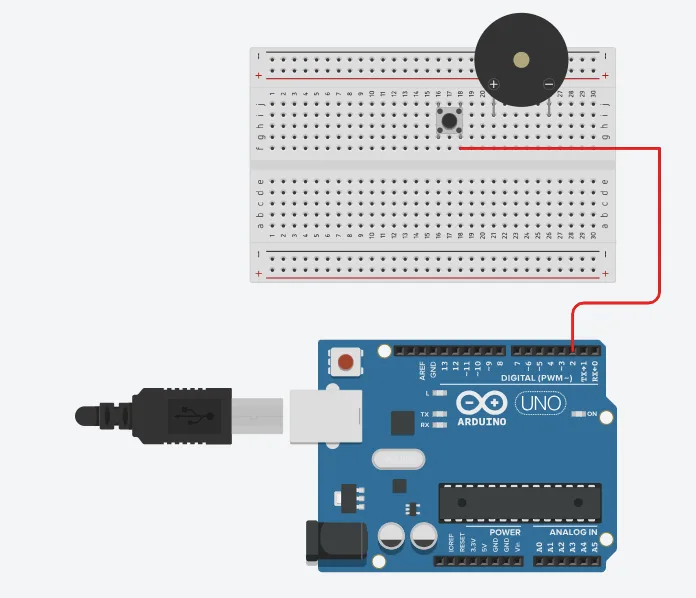
step 2: White Wire: Connect one end to the other pin on row d and the other end to GND on the Arduino Uno
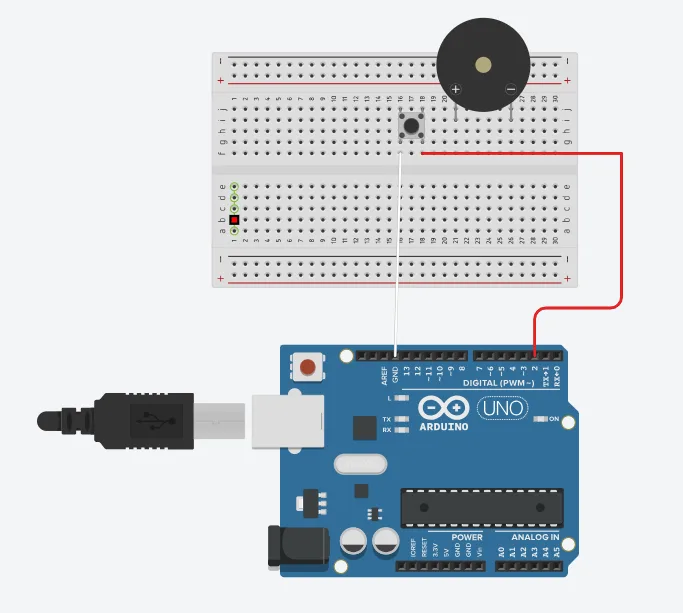
step 3: Red Wire: Connect the positive pin of the buzzer to Digital Pin 3 on the Arduino Uno.
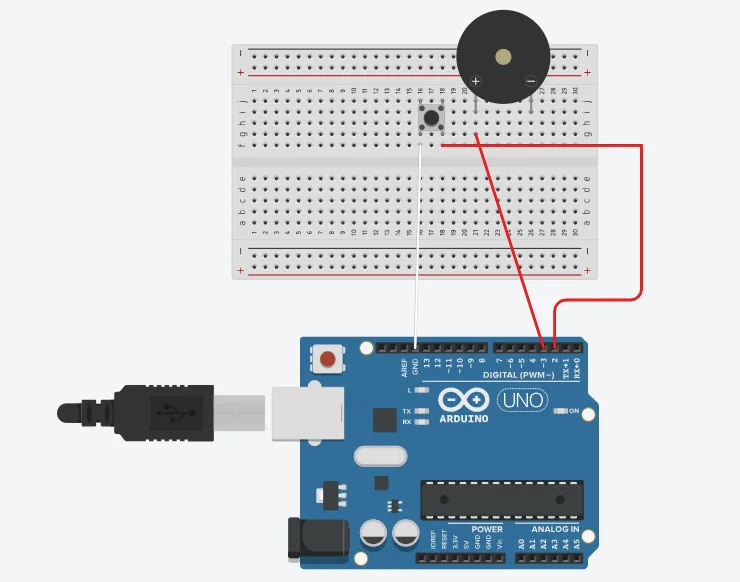
step 4: Green Wire: Connect the negative pin of the buzzer to GND on the Arduino Uno
PROGRAMMING
Step 1: Open your Arduino IDE.
Step 2: Type the following codes before the void setup function.
Step 3: typeint B = 3;as shown in the picture below.
Step 4: Type int buttonState= 0; as shown in the picture below.
Step 5: After the void setup ()within the curly brackets type the following codes.
Step 6: : After the (void loop ()) within the curly brackets type
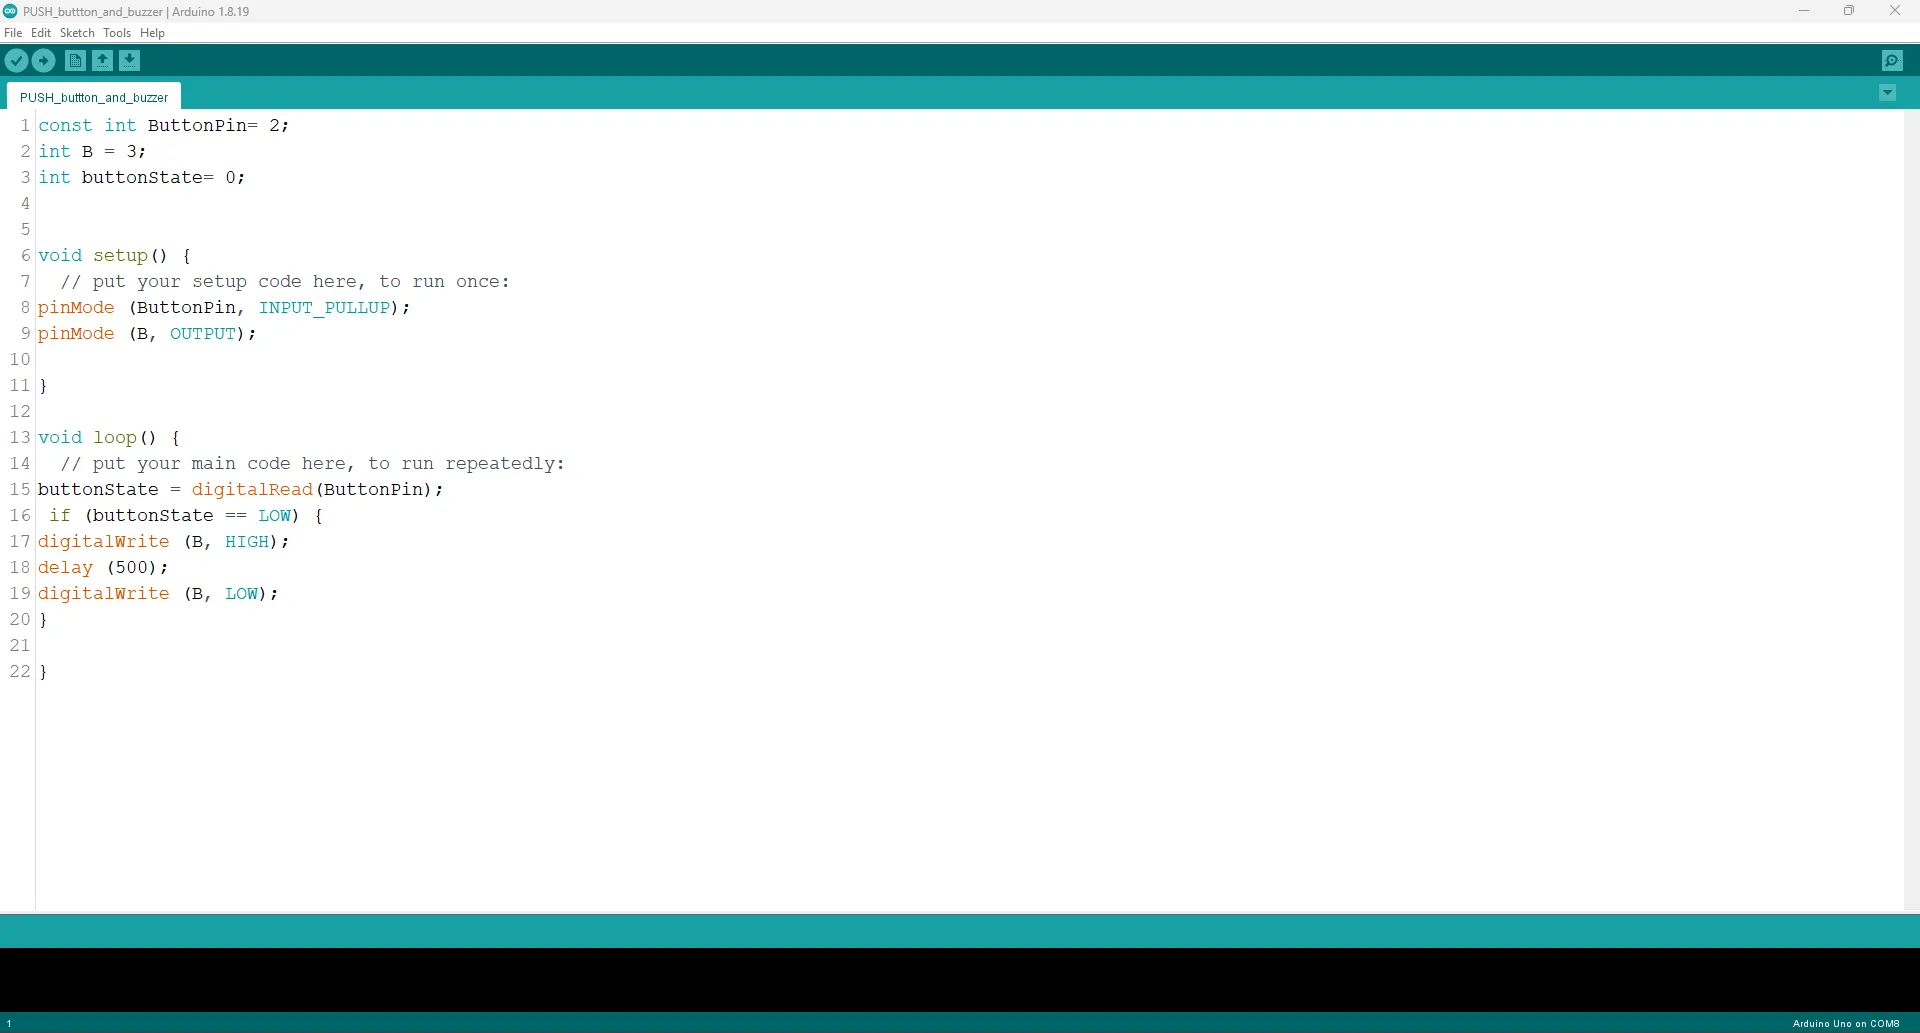
buttonState = digitalRead(ButtonPin);
Step 7: :Now let type
 if (buttonState == LOW) {
digitalWrite (B, HIGH);
delay (500);
digitalWrite (B, LOW);
}
Step 8: After all you are expercted to see this code.
Uploading the code
Step 1: Save your code.
Step 2: Select the arduino board and port.
Step 3: Upload your code.
CONCLUSION
If any issues arise during the upload, recheck the wiring and code for errors. Upon successful testing, this project demonstrates how to use a push button to control a buzzer, laying the foundation for interactive systems.