
Objective
In this project, you will learn how to use a sound sensor with an Arduino to detect and monitor sound levels in the environment. This project introduces the basic concept of sound sensing, which is commonly used in systems such as noise alarms, security devices, and smart systems that respond to sound.
COMPONENTS NEEDED
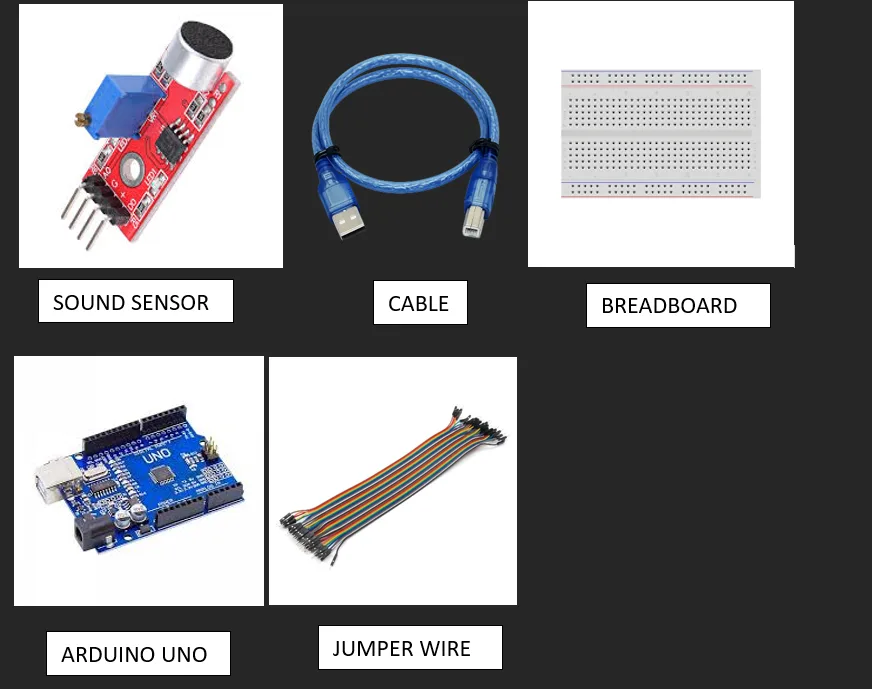
MOUNTING AND WIRING THE LRD SENSOR
Step 1:
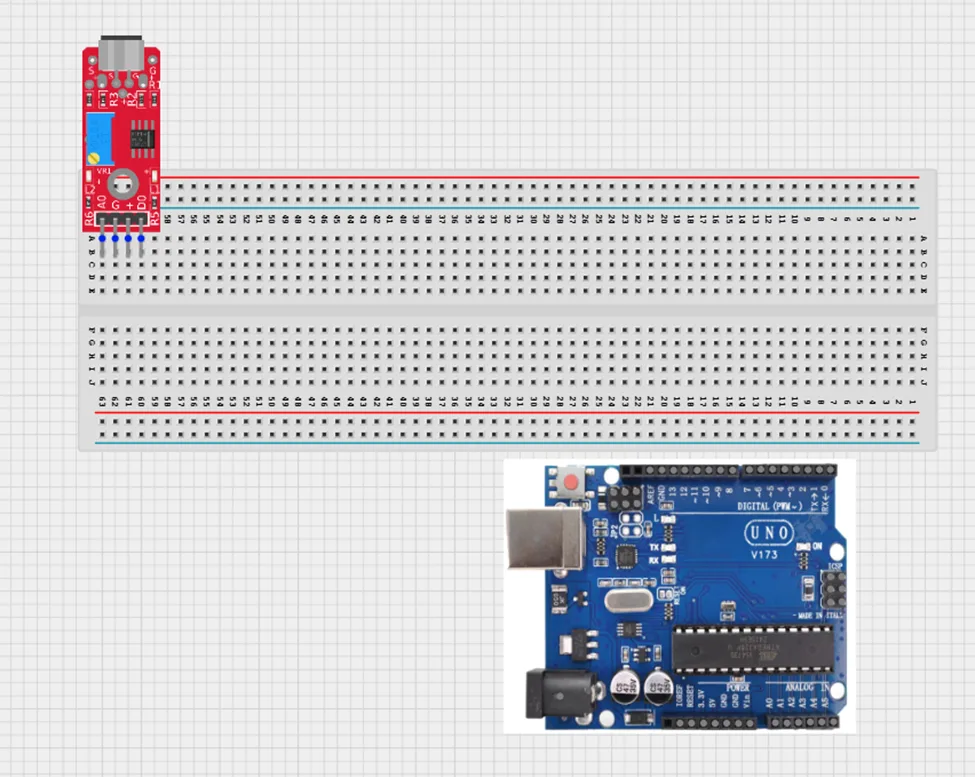
Mount the sound sensor
Insert the 4-pin sound sensor module into the breadboard, ensuring the pins are firmly placed in separate rows.
Step 2:
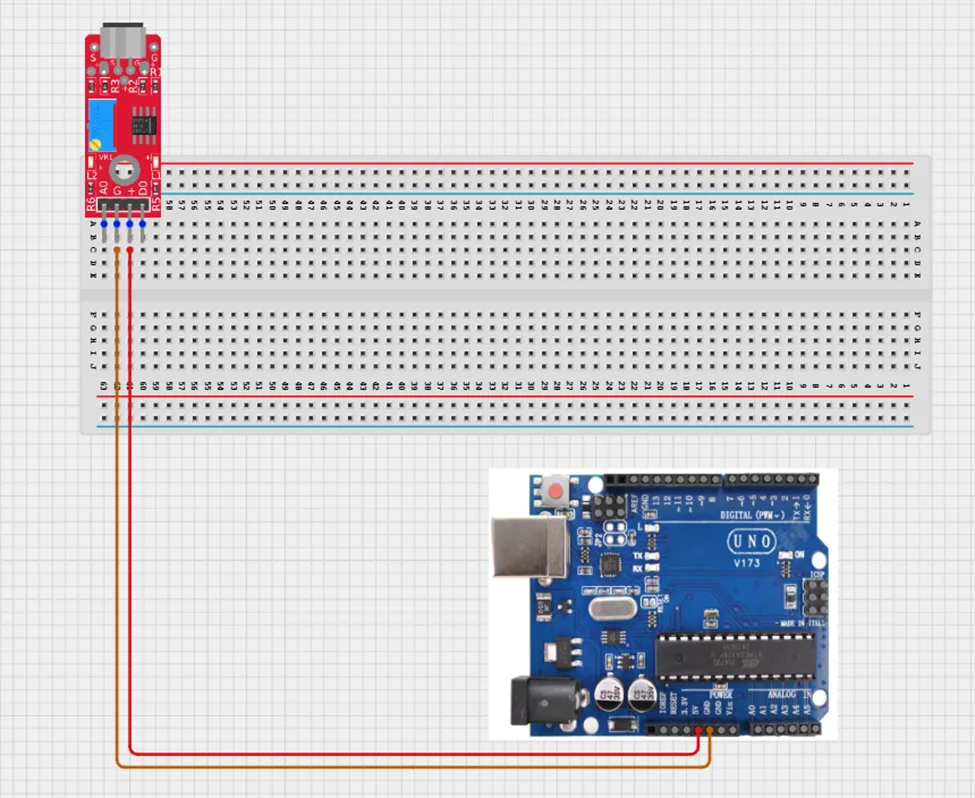
Connect the power wires
Use jumper wires to connect:
- VCC on the LDR → 5V on the Arduino
- GND on the LDR → GND on the Arduino
NB: VCC is the power supply pin that provides electricity to the sensor, while GND (Ground) completes the circuit and allows the sensor to work properly. The GND is the negative terminal.
Step 3:
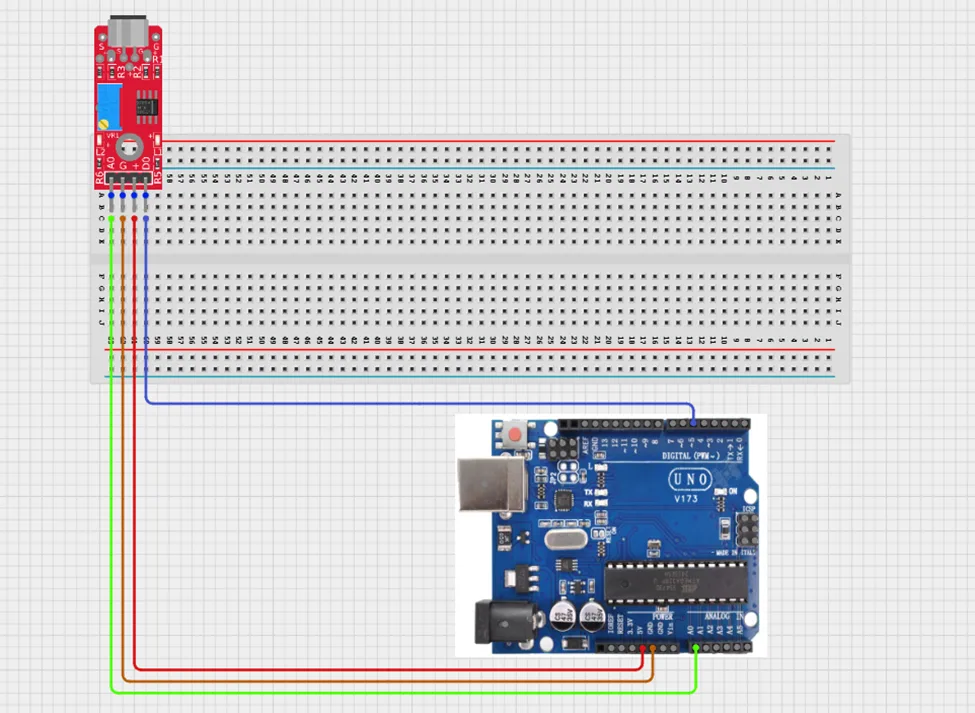
Connect the signal wires and power the board
Connect the AO (Analog Output) pin on the sound sensor to the A0 pin on the Arduino Uno. This allows the Arduino to read different sound intensity levels.
You can also connect the DO (Digital Output) pin to a digital pin on the Arduino if you want the sensor to detect only whether sound is present or absent.
PROGRAMMING SOUND SENSOR
Step 1:
Open the Arduino IDE
Open the Arduino IDE on your computer and make sure the correct Arduino board and port are selected.
Step 2:
Create the sound sensor variable
Before the void setup() function, type:
const int soundSensorAnalogPin = A0;
const int soundSensorDigitalPin = 5;
This tells the Arduino that the sound sensor is connected to analog pin A0.
Step 3:
Start serial communication
Inside the void setup() function, type:
Serial.begin(9600); // Initialize serial communication at 9600 bps
pinMode(soundSensorDigitalPin, INPUT); // Set D5 as input for digital signal
This starts communication between the Arduino and the Serial Monitor so sound values can be displayed on the screen.
Step 4:
Read the sound sensor value
Inside the void loop() function, type:
int soundLevel = analogRead(soundSensorAnalogPin); // Read analog value
int soundDetected = digitalRead(soundSensorDigitalPin); // Read digital value
This reads the sound intensity from the sensor.
Step 5:
Display the sound value
Type:
// Print the analog sound level to the Serial Monitor
Serial.print("Sound Level (Analog): ");
Serial.println(soundLevel);
// Check if sound is detected based on digital output
if (soundDetected == HIGH) {
Serial.println("Sound Detected!");
} else {
Serial.println("No Sound Detected.");
This prints the sound level values on the Serial Monitor.
Step 6:
Add a short delay
Type:
delay(500); // Wait for half a second before next reading
Step 7:
Save, upload, and monitor the code
Save your code, upload it to the Arduino board, then click the Serial Monitor icon in the Arduino IDE to view the live sound values being detected by the sensor.
CONCLUSION
This project demonstrated how a sound sensor can be used with an Arduino to detect and measure sound levels. It helped in understanding how analog and digital signals work, how sensor data is read and interpreted, and how programming controls hardware responses. From an engineering perspective, this system reflects the basic principle used in sound-activated and smart control systems, where sound sensors are applied for responsive monitoring, automation, and interactive devices.